Let’s face facts: Magazines spend a lot of time in the dirt, snow, rain and mud. They suffer high-speed drops during training, kicks, tosses, poundings after they’re stuffed with cartridges and usually ride tactical gear in an exposed-to-the-dust exterior pouch.
Despite the abuse, most survive and even thrive in terrible conditions. They are, however, a relatively common culprit when an AR suffers chronic stoppages. Feed lips can be to blame, but in many cases the malady is dirt.
AR magazines need periodic cleaning. It’s a simple process every experienced gun owner knows, and not exactly a profitable sideline in a busy store. There are good reasons to make the friendly offer whenever someone complains about their AR reliability, however. The list starts with all the new modern sporting rifle owners, many of them frustrated because their ARs are just now experiencing unexplained hiccups.
Big-box stores and internet sites can’t offer this kind of service. It’s a fast-and-effortless process that builds customer loyalty. Your reputation as a resource also grows by walking them through the procedure. It also builds confidence in your wares when you mention you want to know if something strange is going on in a product—reinforcing the fact you don’t stock cheap offshore knockoffs.
Even if they picked up a new magazine and it solved the problem, it’s still worth making the offer to clean and inspect the old one before it’s trashed. Once they see the debris, rusted spring or nicked follower, they’ll understand the necessity of spares.
The procedure couldn’t be easier and is probably so familiar you could do it blindfolded. The only challenge is the fact there are more flavors of magazines on the market than coffee options at Starbucks. And each has a slightly different flavor to their build.
Safety First
If they come in with the firearm and magazine, make sure the AR’s safety is engaged, drop the magazine and clear the chamber — always keeping the gun pointed in a safe direction. Double check everything, just to make sure, then don your safety glasses. Springs are involved.
If any cartridges are in the magazine, unload it and inspect closely. There are tools to measure and correct bent feed lips, but for this procedure we’re avoiding the added investment in time and supplies. The dust covers on some polymer magazines also serve as Go-No-Go gauges, so if they fit, odds are good the feeding mechanism is aligned.
Inspect for cracks in polymer and bends/dings in metal. At the bottom of the magazine, scan the floorplate — which needs removal for cleaning — and identify its locking mechanism.
The floorplate on some metal AR-15 magazines anchor with a small metal detent, or tab, that protrudes into the drain hole. It’s under pressure from the spring to ensure it does not inadvertently release. Apply and hold pressure down on it with any appropriate-diameter tool or bullet, then wiggle the floorplate until the mechanism unlocks, disappearing underneath.
The floorplate on a typical polymer magazine anchors by one or two polymer or metal detents. Depressing them allows initial movement of their floorplate.
What About Metal Mags?
So-called USGI metal magazines require a different approach. Determine the direction the floorplate slides off. Then insert a screwdriver or appropriate diameter tool in the drain hole, and gently pry up that side. Wiggle it clear of the locking mechanism. Do not bend the side tabs.
Regardless of the design, now you use your thumb to maintain control of the spring — otherwise parts go airborne — and then you can fully remove the floorplate. Afterward the spring and follower be worked out for inspection. In some cases, especially with polymer magazines, there is also a floorplate retainer.
The spring may need replacing if it’s rusty or looks worn. Inspect the follower closely for nicks or other abrasions that might impede its travel. Take a close look at the magazine interior, floorplate and retainer (if there is one).
Now it’s time to clean the parts. Most manufacturers do not recommend the use of solutions because their residue attracts and holds dust. Follow the manufacturers recommendations.
Get all the parts scrubbed thoroughly, use a nylon brush on the magazine interior and you’re done. Simply reverse the process to put it back together.
The ultimate function test is live fire, but in the store, insert a dummy round, put the magazine in the gun and work the charging handle. If it chambers effortlessly, the customer’s AR is ready for firing-line time.
Every questionable part a customer sees drives home the point that magazines are inexpensive are a deal compared to the cost of lost range time and frustration. They’ll remember where to buy quality versions next time.
10 Steps to Clean a Magazine
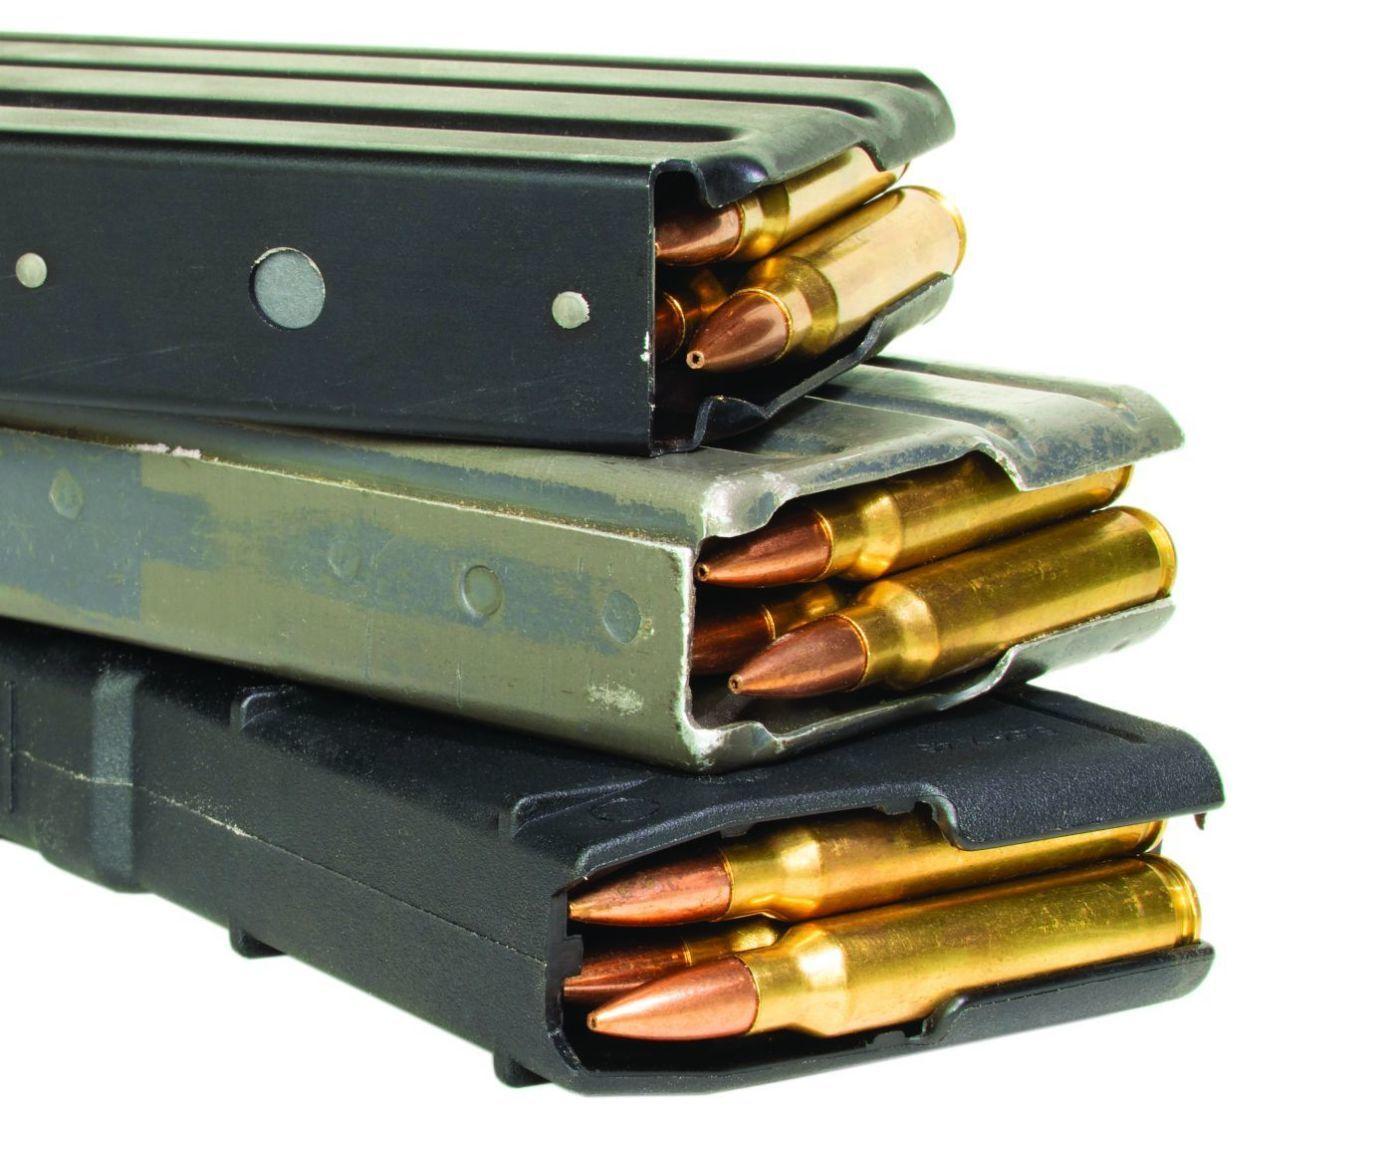
- Magazines come in a variety of styles and sizes in both metal and polymer. Manufacturers also don’t always agree on the best mechanisms to retain the floorplate—which must be removed to perform maintenance—so anticipate some diversity.
- Springs are involved, so put on safety glasses. Now you’re ready to unload the magazine(s).
- A small, recessed-metal tab on the floorplate is one of the retention systems used in AR magazines. Depress it, hold down, and you will be able to start sliding it off.
- A common locking mechanism on polymer magazines is a detent, or two, that must be depressed (and held down, at least at first) for the floorplate to slide off the magazine body.
- On USGI-style metal magazines, floorplate removal requires the insertion of a screwdriver or other tool in the drain hole to gently pry up the locking side. Perform this chore gently, because undue pressure can damage and fatigue the metal.
- Once unlocked, you’re ready to begin removing the floorplate. It may require some pressure and wiggling to get it moving, particularly on older magazines with little or no maintenance.
- As it moves, the spring or another plate beneath will expose. Maintain control of them with your thumb, otherwise the spring and other parts will launch.
- Remove the spring and follower. It may take some wiggling to get the latter out, but it will surrender.
- Inspect the spring for rust and debris. Look closely at the follower for nicks that might hang it up. Clean both, along with floor plate and retention plate (if there is one) then use a nylon brush to scrub out the magazine body’s interior.
- Reassemble the magazine by reversing the steps. Now it’s time to insert a dummy round or snap cap, then put the magazine into the gun while pointing it in a safe direction and work the charging handle to ensure it chambers properly. A range session is the acid test, but customers always appreciate the confidence-building information it provides.