Do a final function and safety test before returning to the customer. If the installation was a laser sight unit, co-witness the laser to the iron sights or sight in with the customer’s preferred defensive load. (Photo: Guy Sagi)
The retail landscape continues to evolve as the industry comes to grips with a new norm in sales. Thriving in this climate may be a challenge, but, historically, old-school emphasis on customer service and value added has been the most reliable formula for success during change. We’ve all dealt with bargain-basement stores in one industry or another.. Somehow it’s always the place that treats us best, then follows up with service that we return to — and recommend to our friends.
Today, perhaps more than ever, it’s a sound strategy. In 2015 and 2016, firearm demand was so high that many customers were forced to take home a gun missing many of the accessories they wanted. All those rail- and light-free 1911s in new owners’ hands — coupled with the tens of thousands that’ve been diligently doing duty as truck or nightstand guardians for years — provide a target-rich environment for aftermarket sales, one that’s even budget-friendly for owners.
Volumes have been written about the advantages of light/lasers on a handgun, particularly those performing self-defense duties, although convincing longtime owners to change anything on their 100-years-of-reliability can be a challenge. Solutions are common today, even for a bare-bones version of John Moses Browning’s handgun masterpiece and some of them don’t require altering the grip or replacing mechanisms. Here’s a look at installing one version.
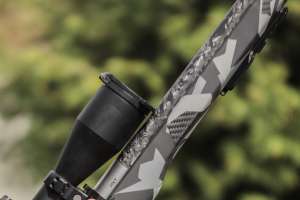
Naturally, the magazine needs to be removed from the firearm. Check and double check that the gun is unloaded and remove all ammunition from the immediate area. Then clean the triggerguard and adjoining surface around the frame and grip. The light/laser body will cover some real estate there and residual rust and sand could scratch the finish during installation.
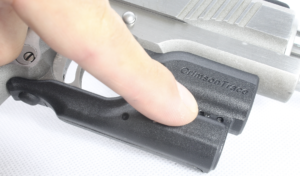
After installation, confirm the operation of the master switch if so equipped. (Photo by Guy Sagi)
Take the light/laser out of its packaging and ensure the batteries are removed. LED circuitry is not voltage-surge friendly and laser dots or blinding lights dancing around the shop aren’t exactly a warm welcome to customers, either. If possible, preassemble and check for function before installing.
Separate the pieces and insert the battery into the battery compartment side. Place that side of the light’s body on the triggerguard in proper position. This unit has one with a “wing” that straddles both sides of the triggerguard, near the grip. Mounting it first makes subsequent steps easier.
Take the remaining side of the unit and mount it to the triggerguard starting at an angle and mating it to the other side. Slight pressure may be required to seat it firmly, but don’t unduly force things. Carefully ensure all the electronics are aligned and seated properly.
Replace the laser/light’s bolts and tighten according to manufacturer’s recommendations. Go back and double check for snugness, because you don’t want things rattling lose after a few range sessions. Tight confines might make it a challenge to apply Loctite Blue without unsightly spillover. Not all manufacturers recommend using it, so use your discretion in application, if any.
Now’s the time to ensure the unit doesn’t invade any triggerguard space and that things are solid enough to survive recoil. If not, check bolt tightness or disassemble, inspect to make sure everything is aligned properly and reassemble.
Check laser and light operation, and once you’re satisfied, it’s time to sight in if the unit has a laser sight. As always, a laser bore sighter can get you on paper before leaving the shop, or simply co-witness with the iron sights.
For the final fine tuning, though, be sure to use the same self-defense or practice loads the owner prefers. For obvious reasons, it’s wise that everything is set up for the former. Asking beforehand is one of those added professional touches they’ll remember and appreciate.
Dial in for elevation and windage one correction at a time during the session. Once you’ve found one, and it doesn’t change, it’ll maximize confidence that the unit is holding zero as you work the other onto the bullseye. Once complete, test to ensure there is no migration in point of aim/point of impact.
Done right, the customer will be pleased with the results and hopefully come back often for more practice fodder. If nothing else, his or her friends at the range will inquire about the improvement to his beater truck gun — and that’s a good thing.